So you’ve either boxed your bike yourself or you’ve had us do it for you, and now you’re at your destination - you’ll need to be able to unbox and re-assemble your bike before you can ride. This quick guide will walk you through the most common steps to get your bike set back up.
If you are having difficult and want to run something by us, give us a call during our hours of operation and we’ll do our best to assist you!
What you need:
- 15mm pedal wrench.
- Allen keys (4mm, 5mm, and 6mm are the most common sizes, but we recommend checking your bike’s main bolts (mentioned below) for another size before boxing it / getting it boxed).
- Small bottle of bicycle lubricant.
- Bicycle tire pump and/or tire pressure gauge.
What you need to do:
1. To start, you’ll want to cut the tape that seals the top of the bike box. It’s a good idea to do this carefully and cut only the tape as a stray cut through the cardboard could damage your bike. If you’re travelling and plan to re-box your bike for a return trip: when pulling your bike out of the box, carefully remove and keep all of the packing materials and/or take a photo of how the bike is wrapped and positioned to make re-boxing a bit easier. When pulling your bike out, it’s a good idea to check it for damage and report any to the transporter.
2. Your front wheel is almost certainly removed and stowed beside the rest of your bike in the box. There are a few different ways to get your front wheel back on, depending on your axle type:
a. Standard QR: you’ll want to re-install the wheel by first insuring that the quick-release handle is in its open position and guiding the axle into the two openings (dropouts) at the bottom of your fork. Ensure that the axles are all the way in the dropouts before tightening the quick release. The quick release handle should be somewhat difficult to close. Ensure the wheel is sitting straight in the fork. Ensure the quick release handle is on the non-drive side, and align disc brakes between the two pads in the brake calliper before tightening.
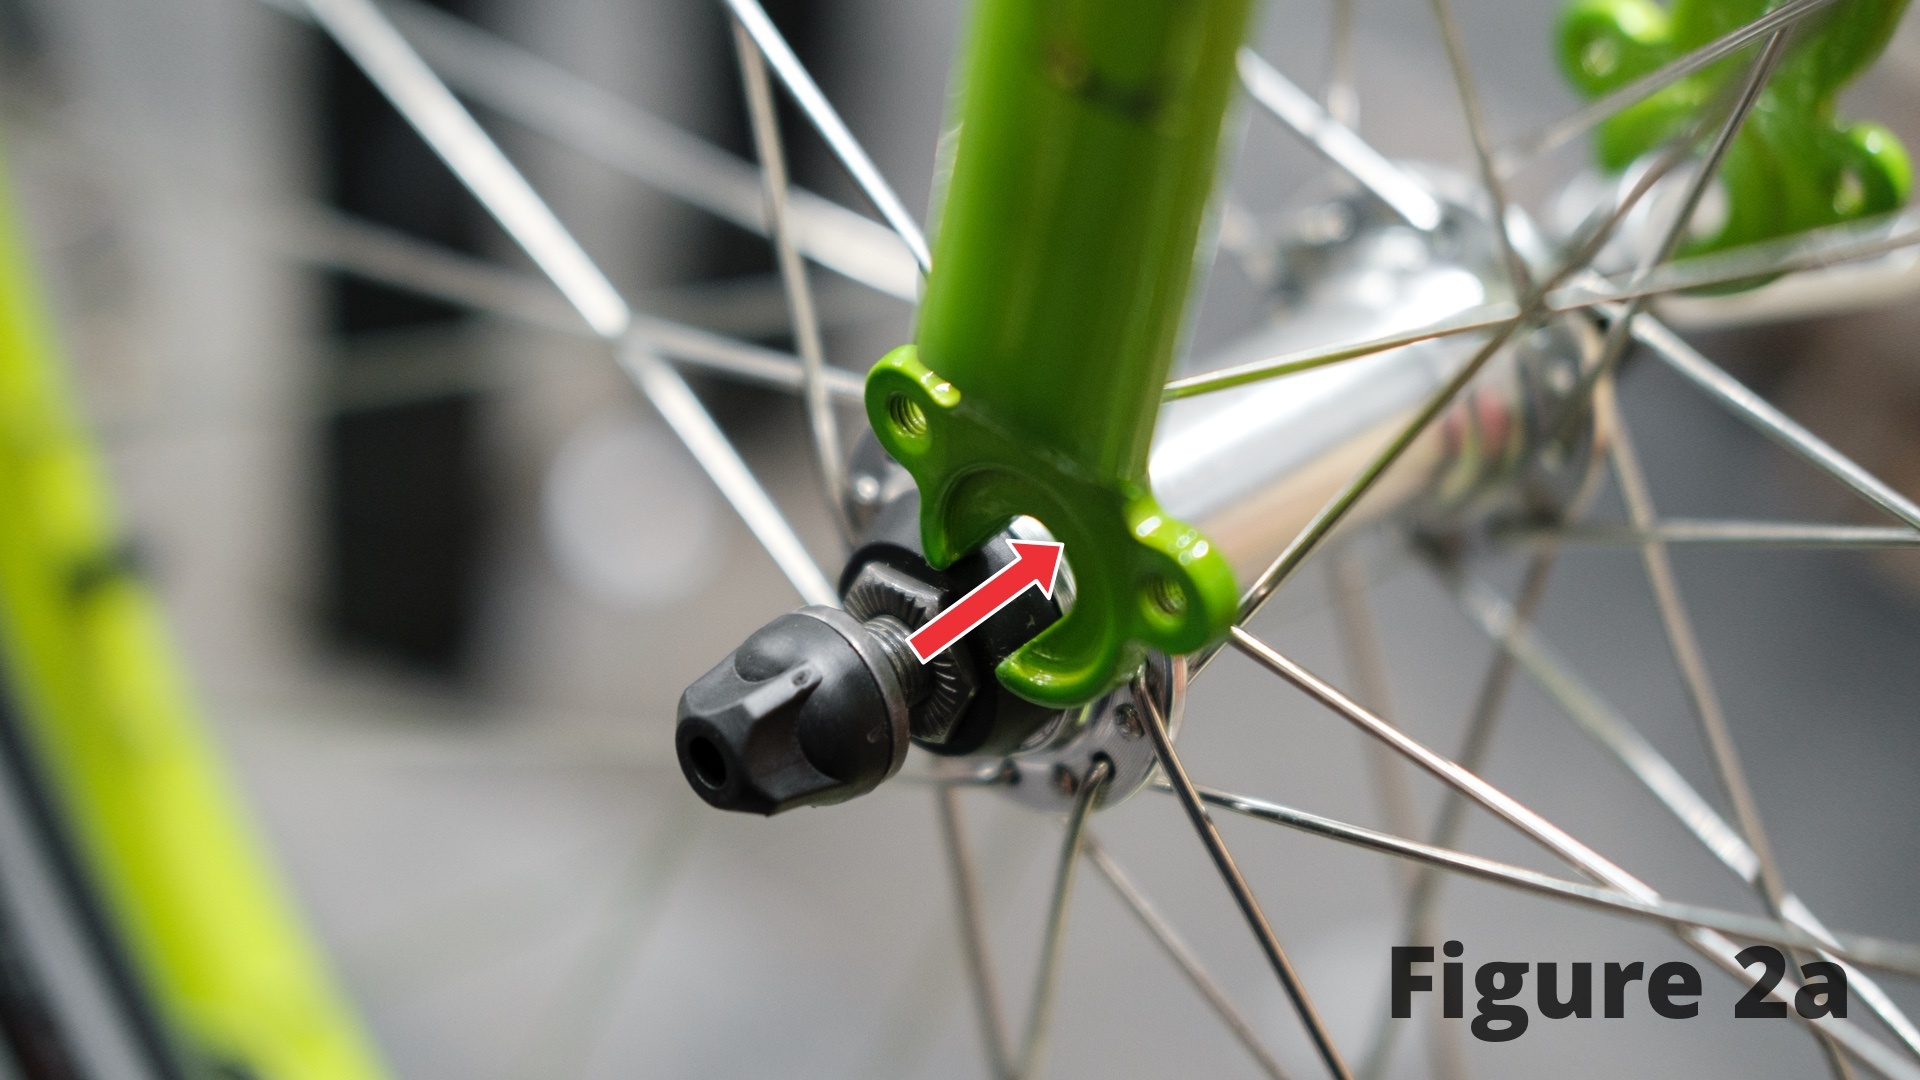
b. Thru-axel: first line up the hub opening with the fork and guide the axel all the way through, tightening appropriately.
3. Re-install seat and seat post. Slide the seat post into the frame and fasten with an Allen key or by closing the quick-release lever (depending on which you have). If you haven’t already marked your desired seat height on your post, adjust the seat until you can touch the balls of your feet to the floor (try this after completing Step 4) and fine-tune your preference from there. Ensure the seat is aligned straight with the top tube of your bike.

4. Your handlebars will either be detached on their own, or with the stem connected. After completing 4a or 4b, put the front tire between your legs and try turning the bars, they should not move with moderate exertion - re-align and re-tighten as needed prior to riding.
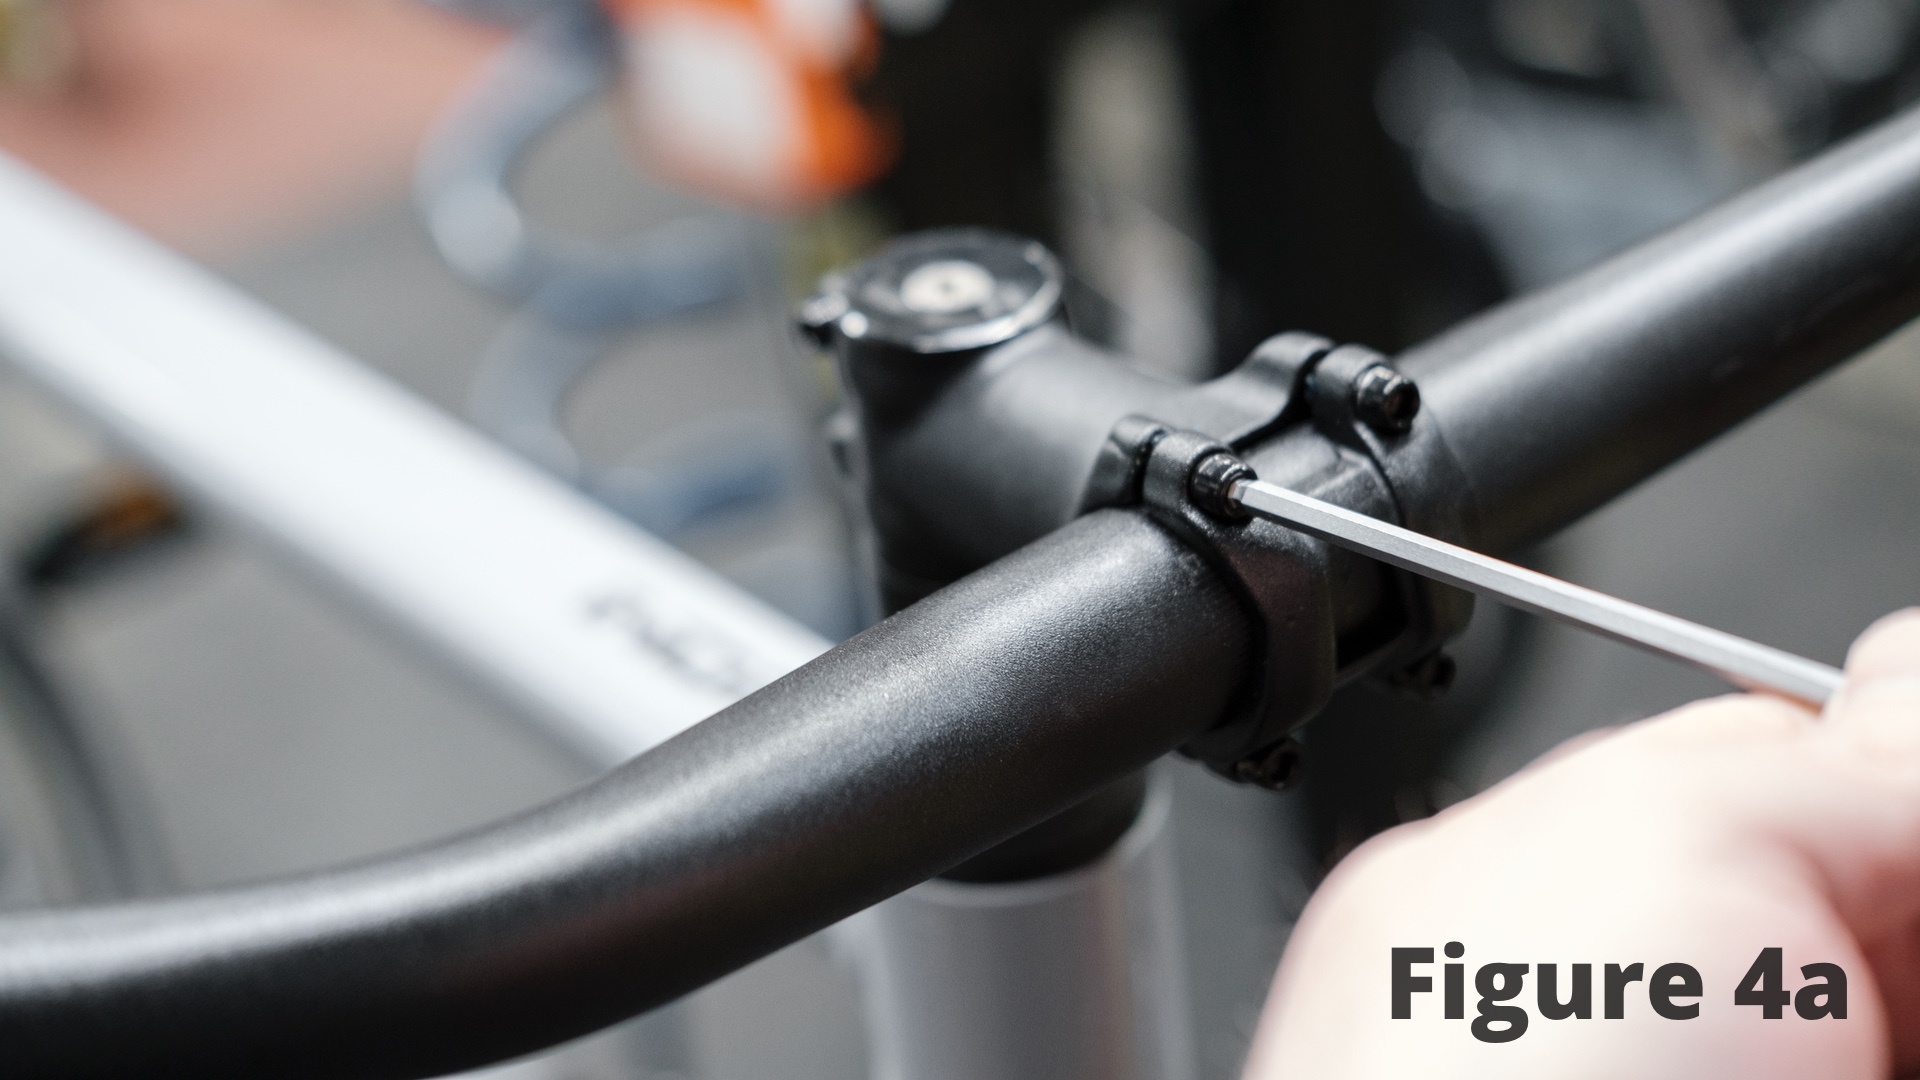
a. Handlebars detached only: remove the 2-4 stem bolts and plate. Centre and adjust the handlebars as you replace the plate and bolts, securing all firmly and evenly. Ensure the handlebars are aligned perpendicularly to the front wheel and brake and shifting levers are in a comfortable position.
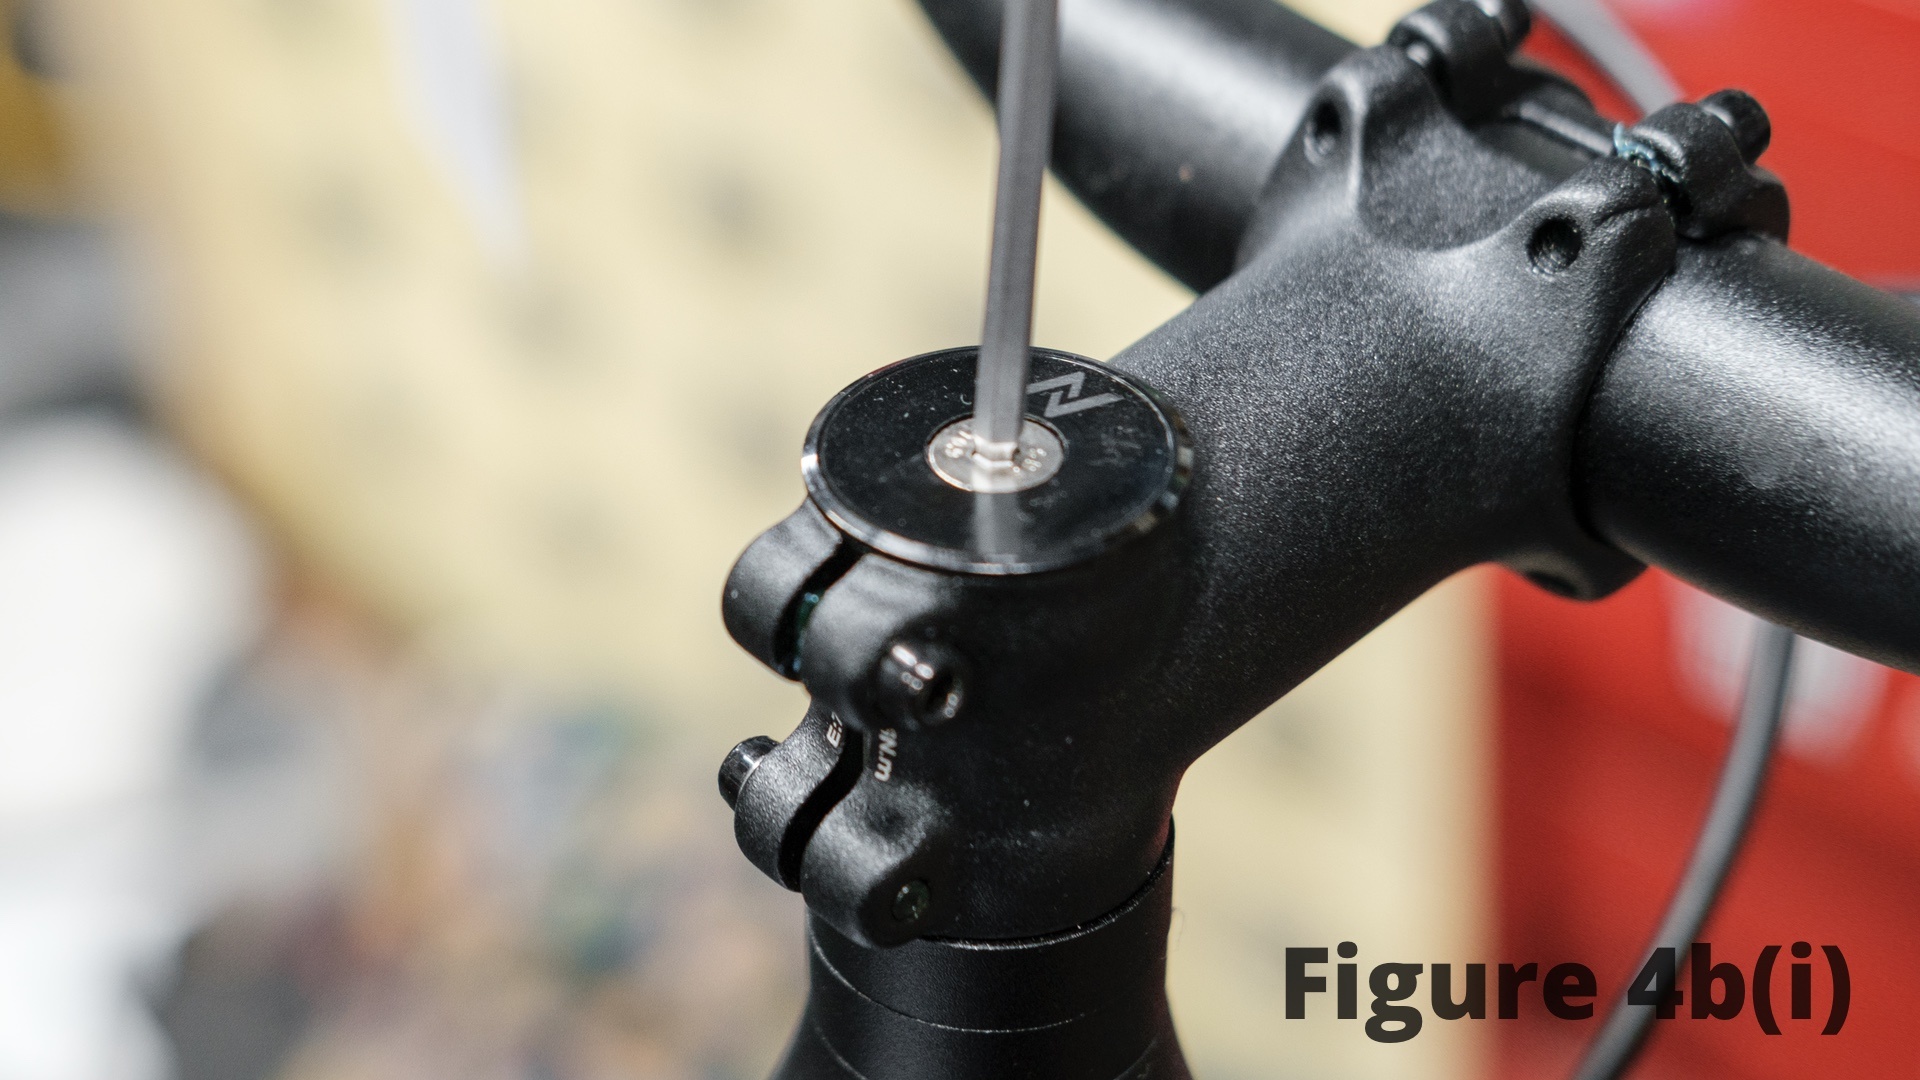
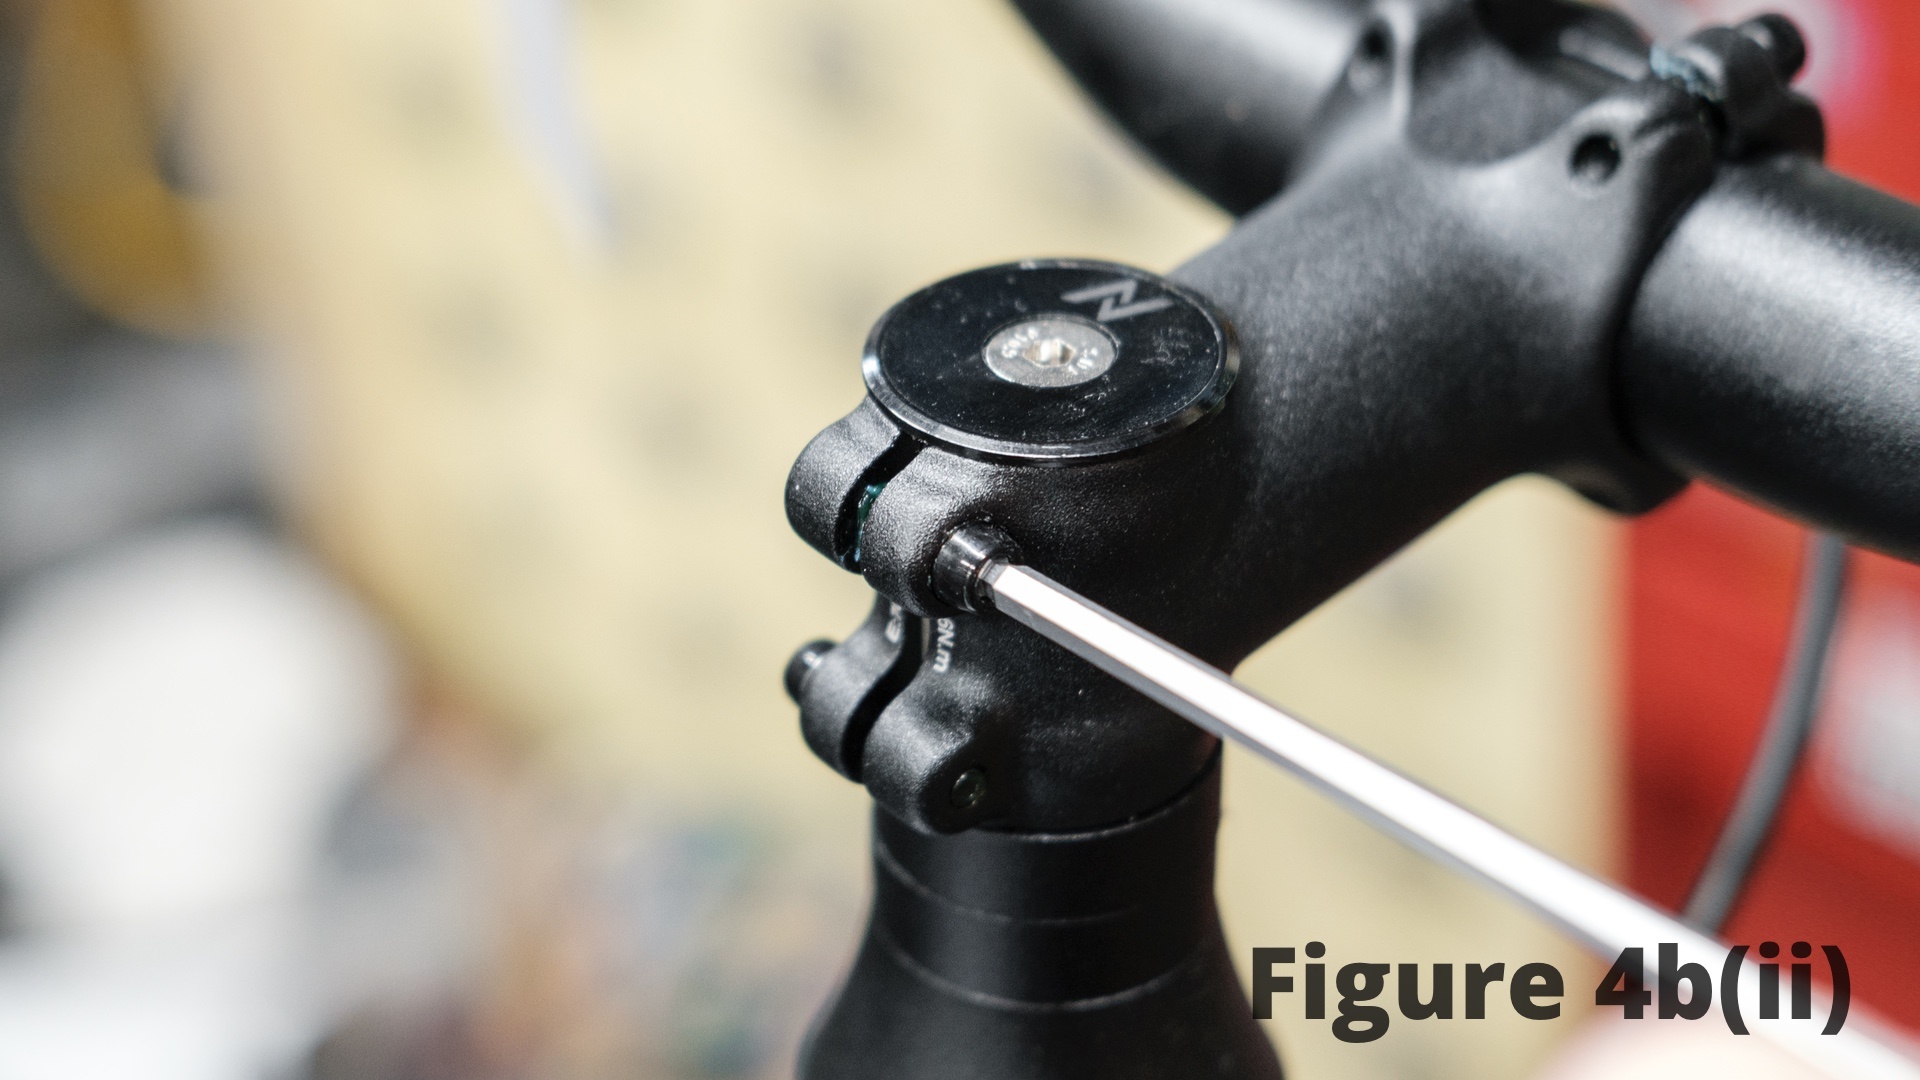
b. Stem and handlebars detached: remove the top cap with the correct Allen key, slide stem and handlebar down onto the fork. Replace top cap and tighten bolt until there is no play and then align handlebar and front wheel perpendicularly and tighten stem clamp bolts, ensuring both are tightened evenly and the handlebars still turn freely.
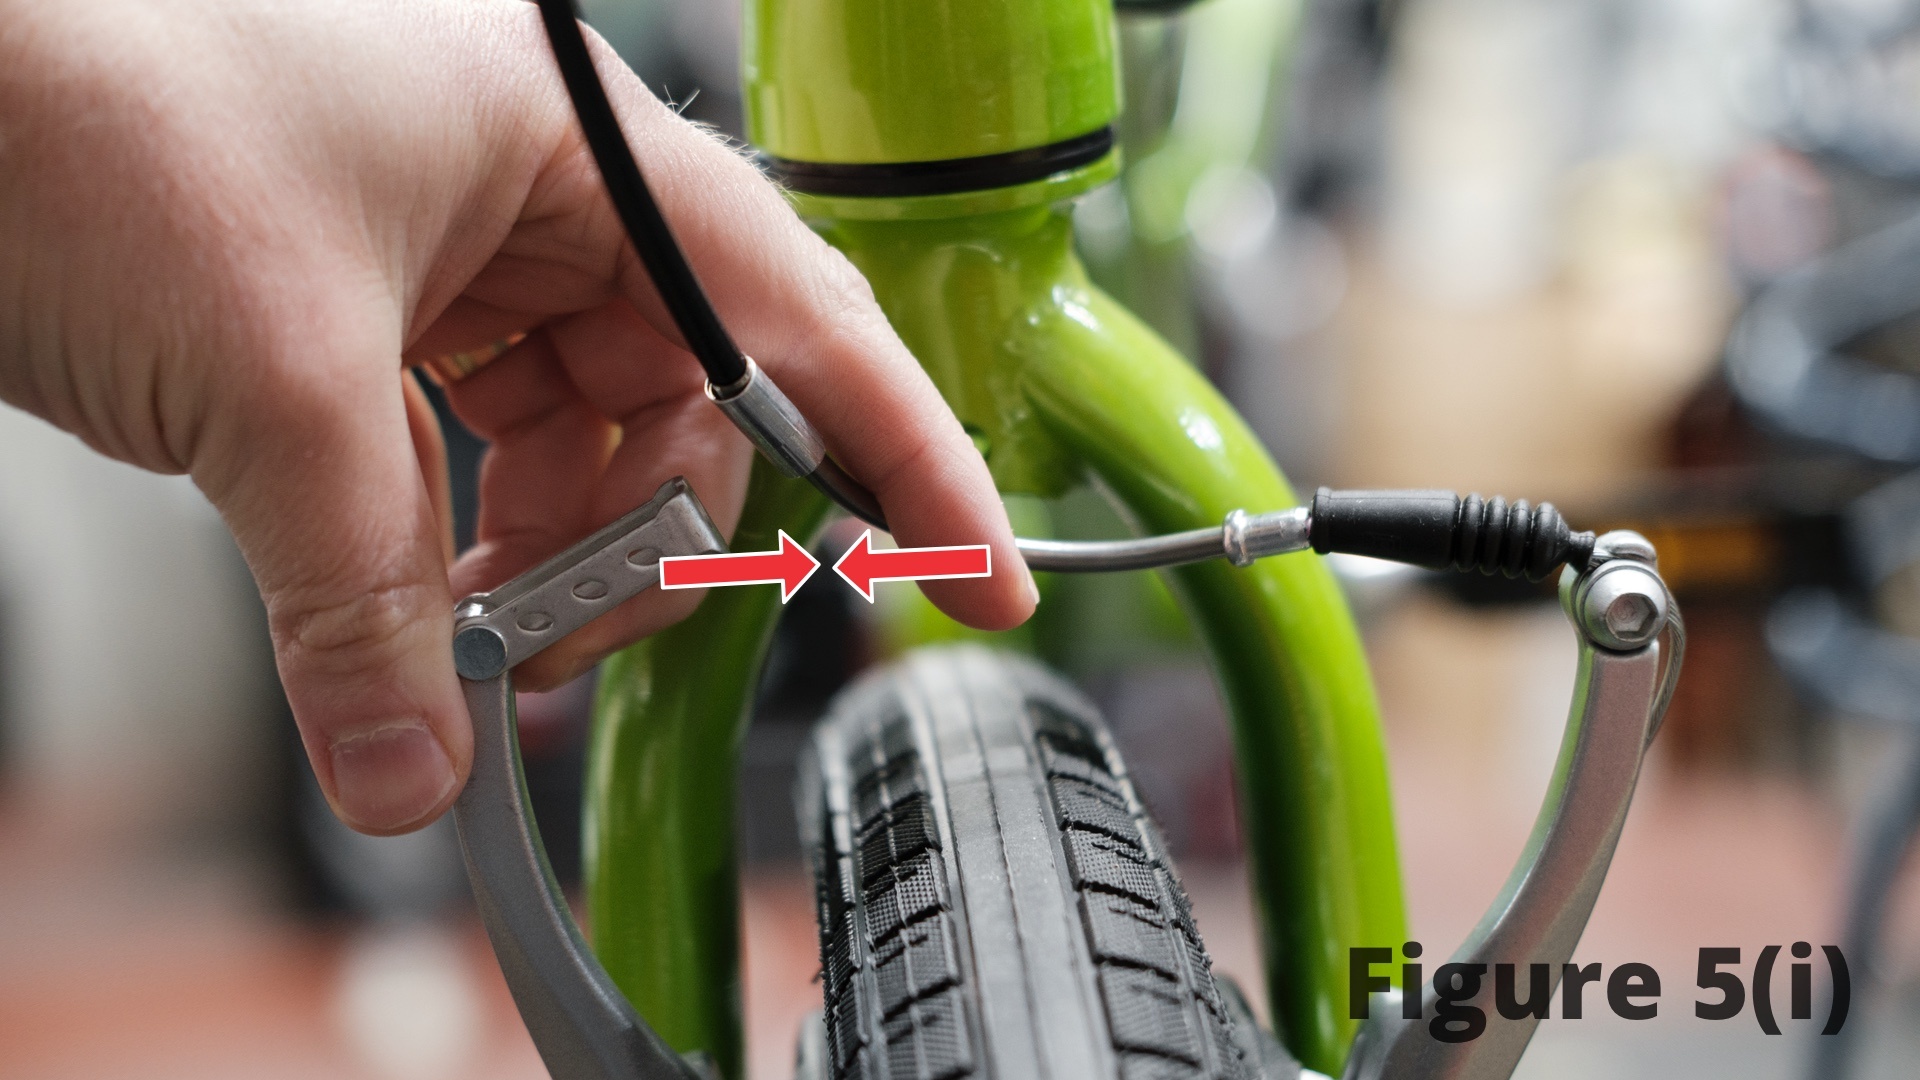
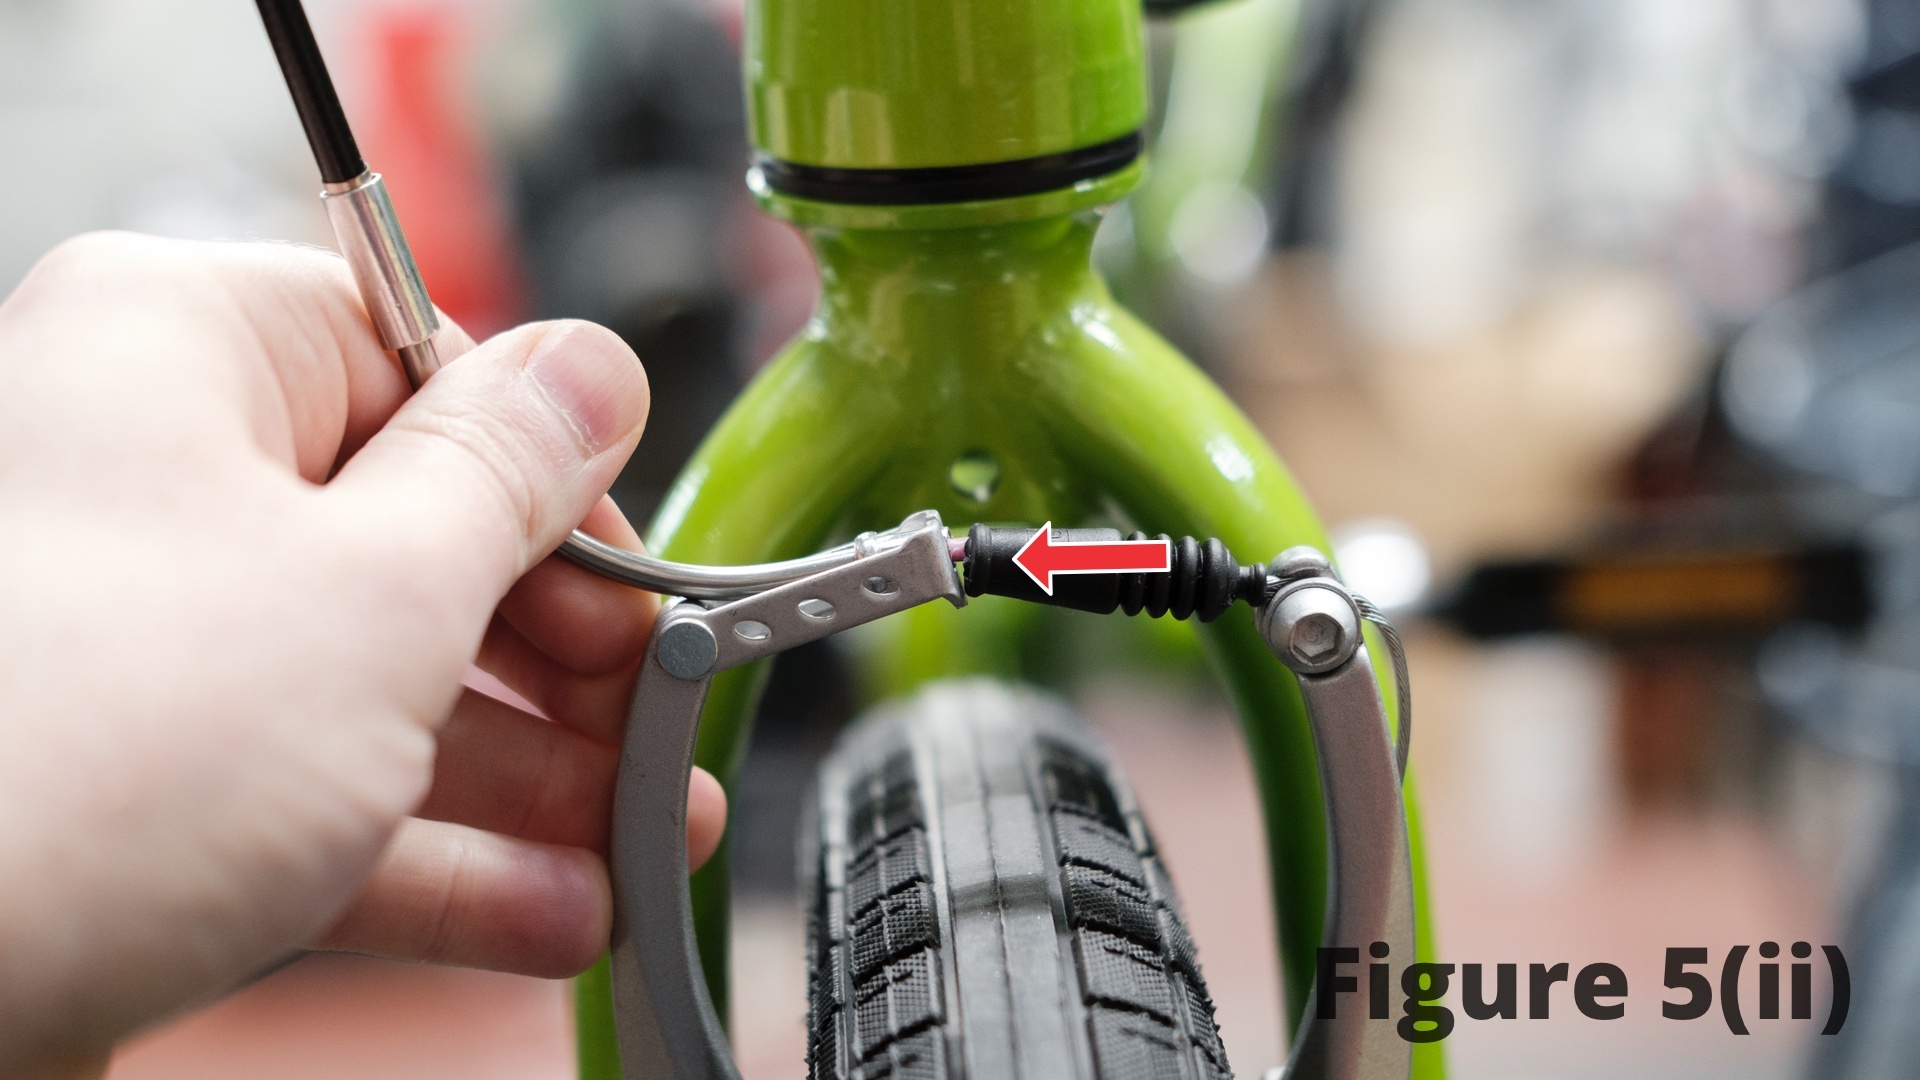
5. If your bike has V-brakes, you will need to re-attach the front brake. The easiest way to do this is to grab the brake cable noodle and opposing brake arm and pull the two together, fitting the noodle flange into the accompanying notch. Re-position the rubber sleeve to cover the cable.
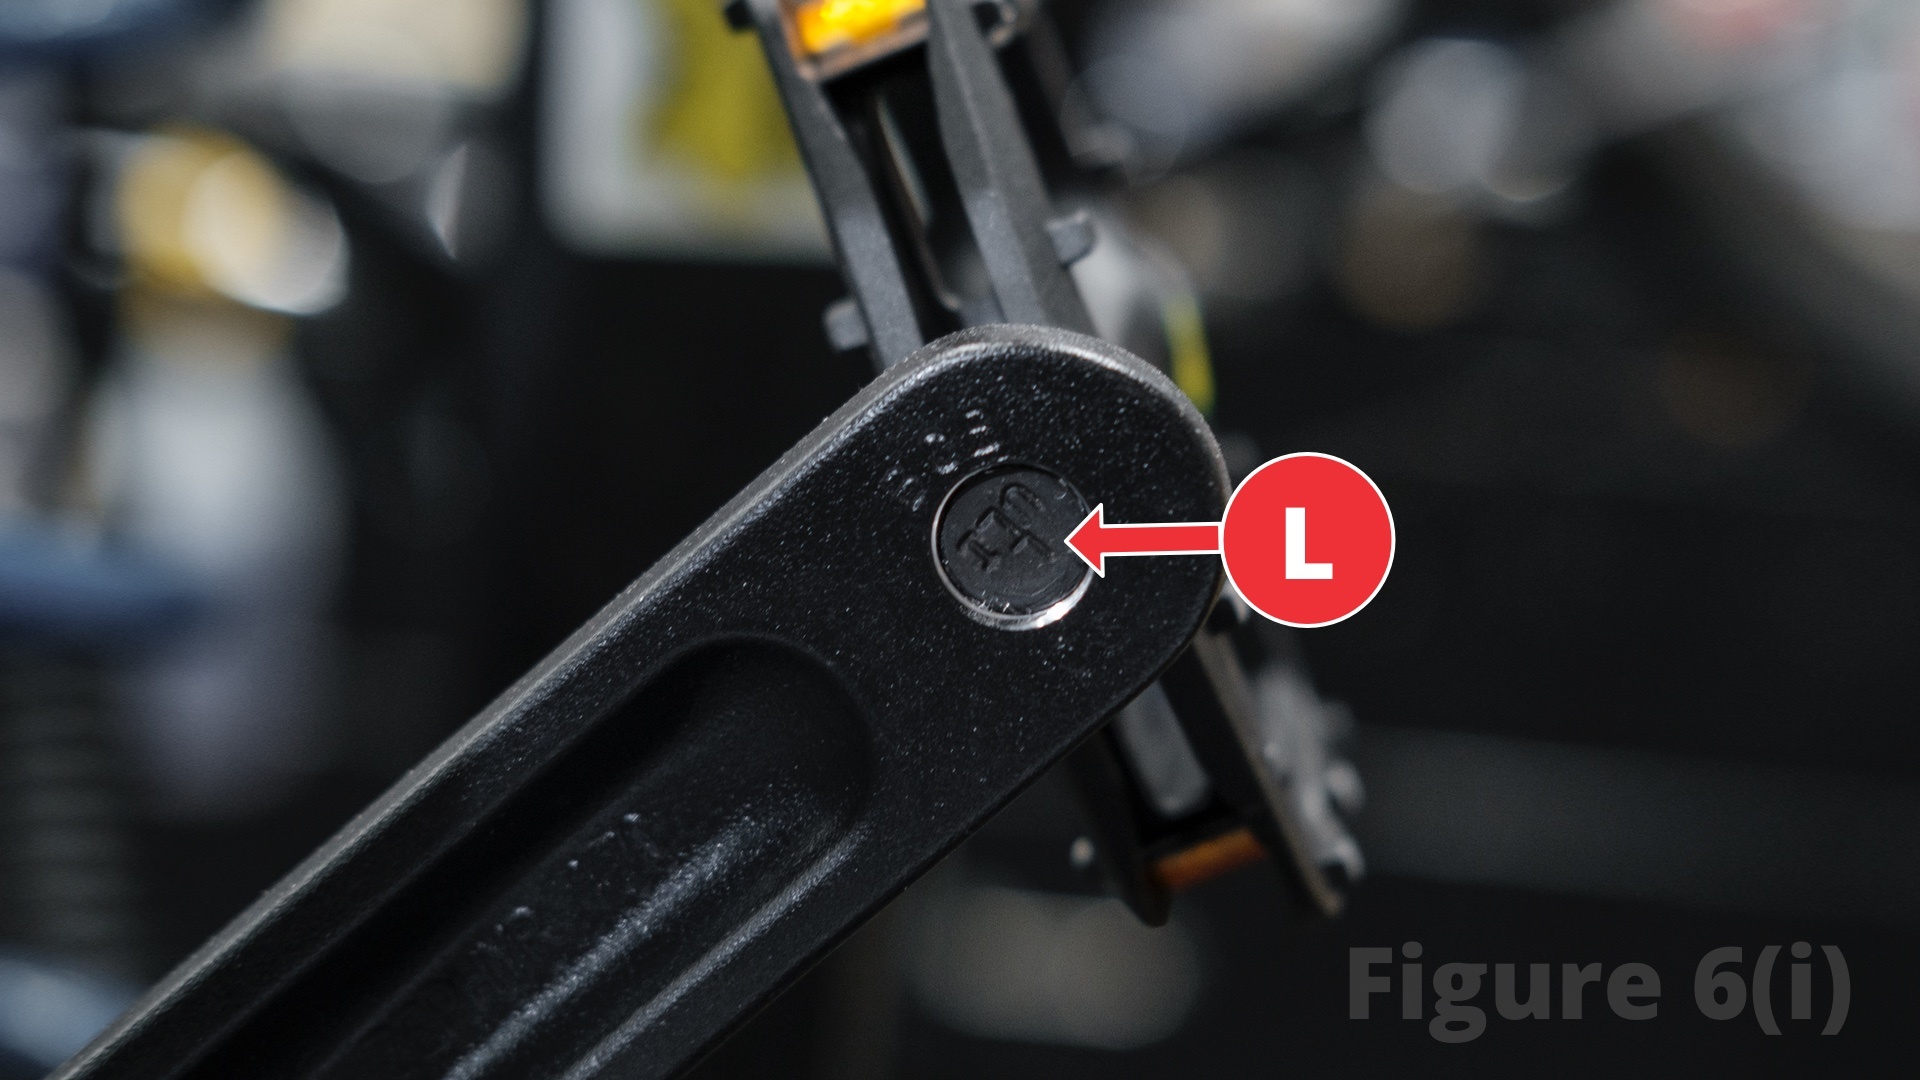
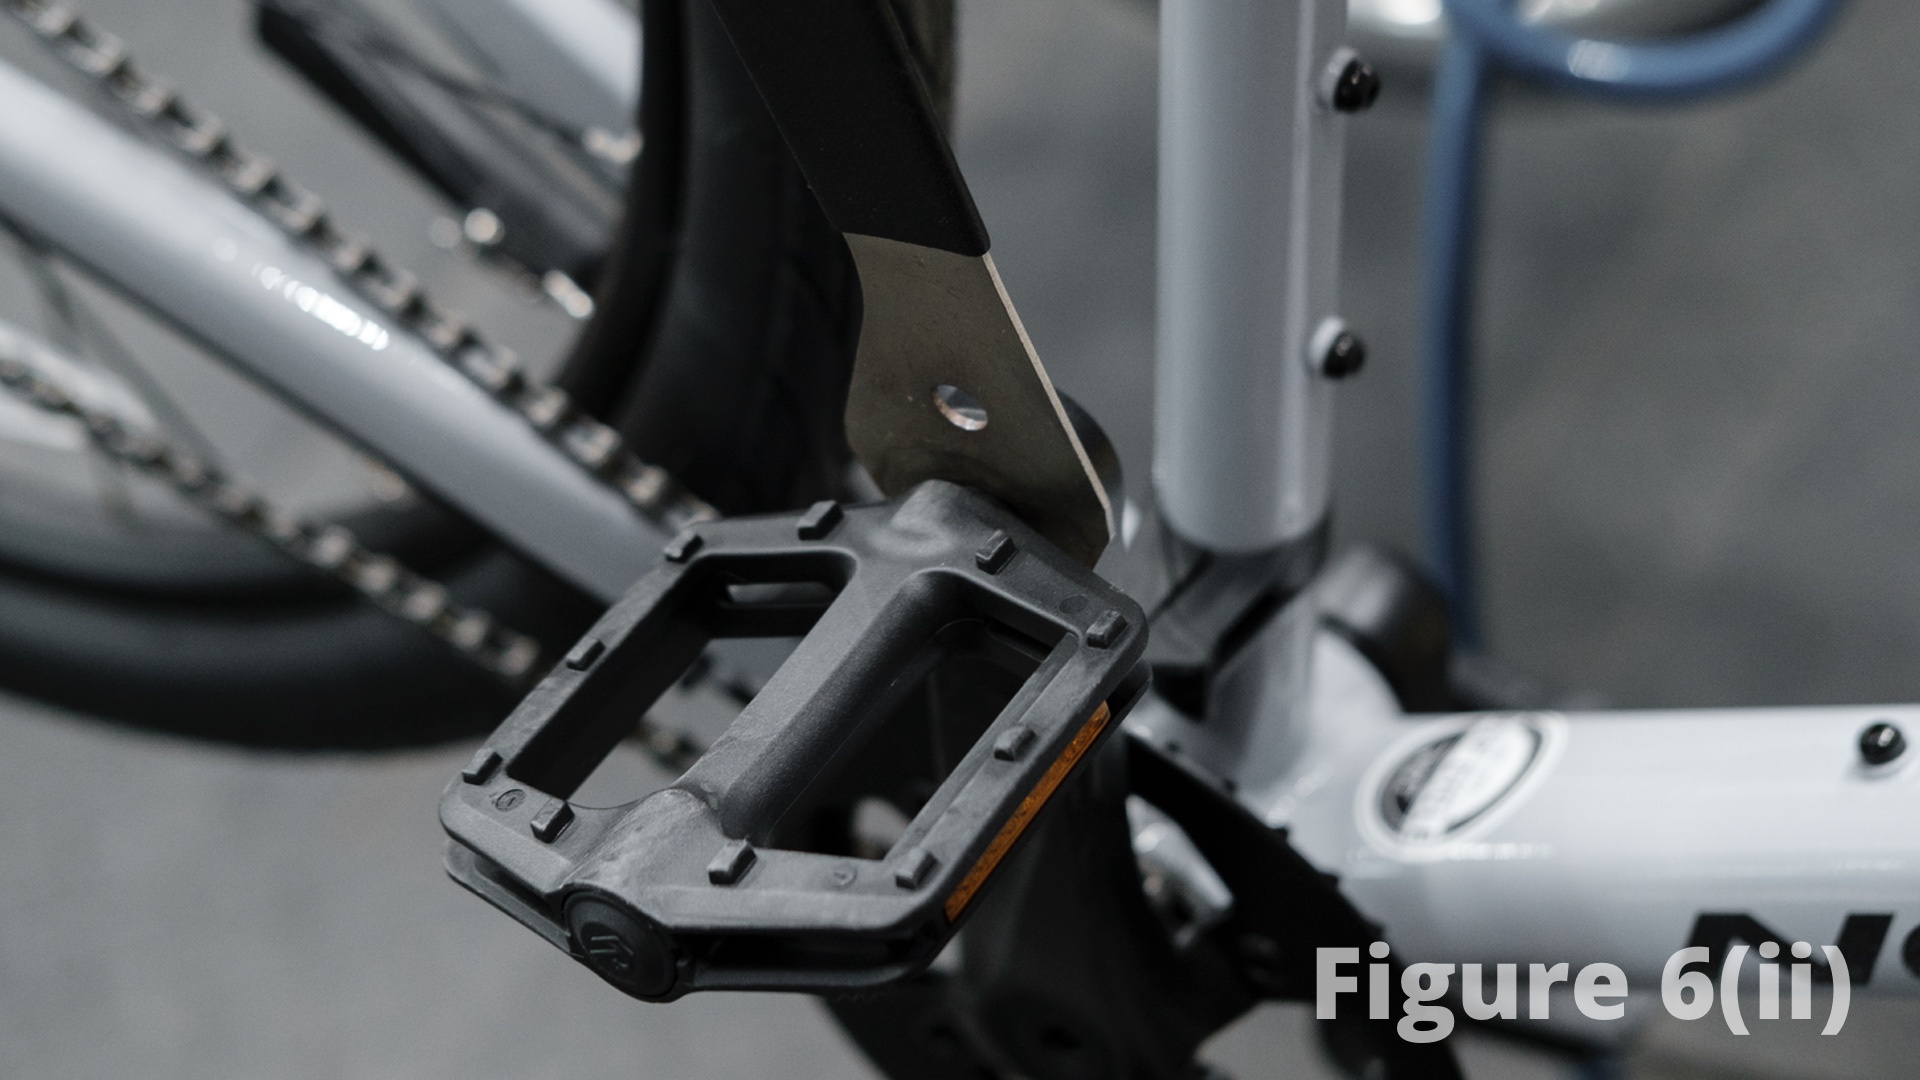
6. Re-install your pedals. Be sure to match the correct pedal to the correct side as they are threaded differently. On the pedal spindles, there should be an “L” or “R.” Begin threading the pedal on by hand - being careful not to force it on and cross-thread your crank arm - and use your 15mm pedal wrench to snug the pedal up.
7. Reference the sidewall of your tires for a maximum tire pressure or pressure range, this should be displayed in PSI (pounds per square inch). Using your bicycle pump or tire pressure gauge to check your tire pressure, inflate your tire. If your tire is completely deflated out of the box, ensure the tire bead is sitting on the rim correctly as you inflate, stopping and deflating if the tire bulges out anywhere.
8. Ensure your chain is on the right gear by lifting the rear wheel off the floor and pedalling the bike with your hand, you may notice the chain moves gears here, which just means your bike was shifted in transport. It’s better to get that shift out of the way before you start riding. Do a quick once over before riding, and enjoy!